Getting Asterisk VOIP systems set up and working behind a pfSense firewall has become routine as pfSense grows in popularity and as our clients switch from legacy phone systems to Voice over IP systems.
The following setup instructions for opening firewall ports to allow SIP traffic through pfSense has been tested, and works, for Avaya, FreePBX and Asterisk VOIP systems.
The process of opening the SIP and RTP ports is needed both to connect to the SIP trunk provider and to get audio working in both directions once connected. If you have audio only in one direction, take a look at the RTP port settings shown below.
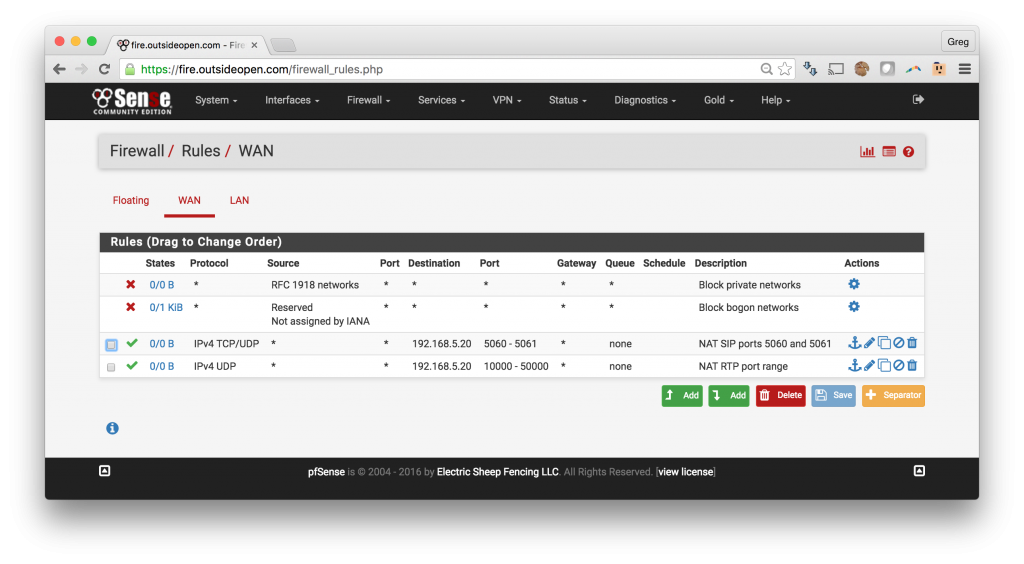
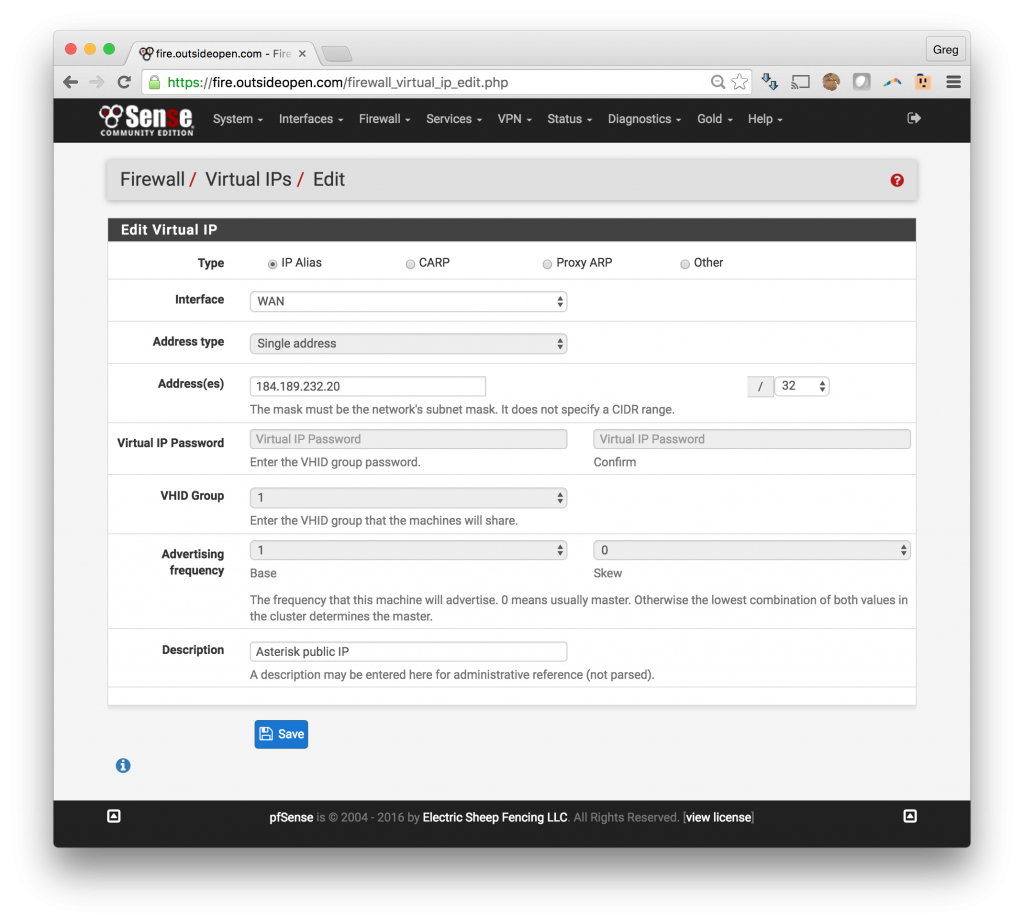
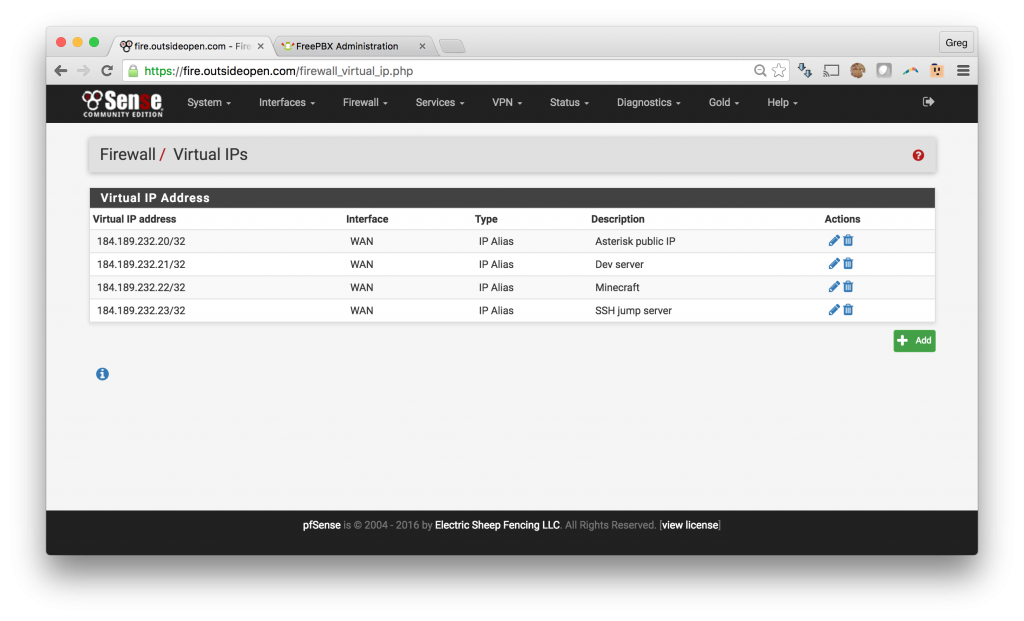
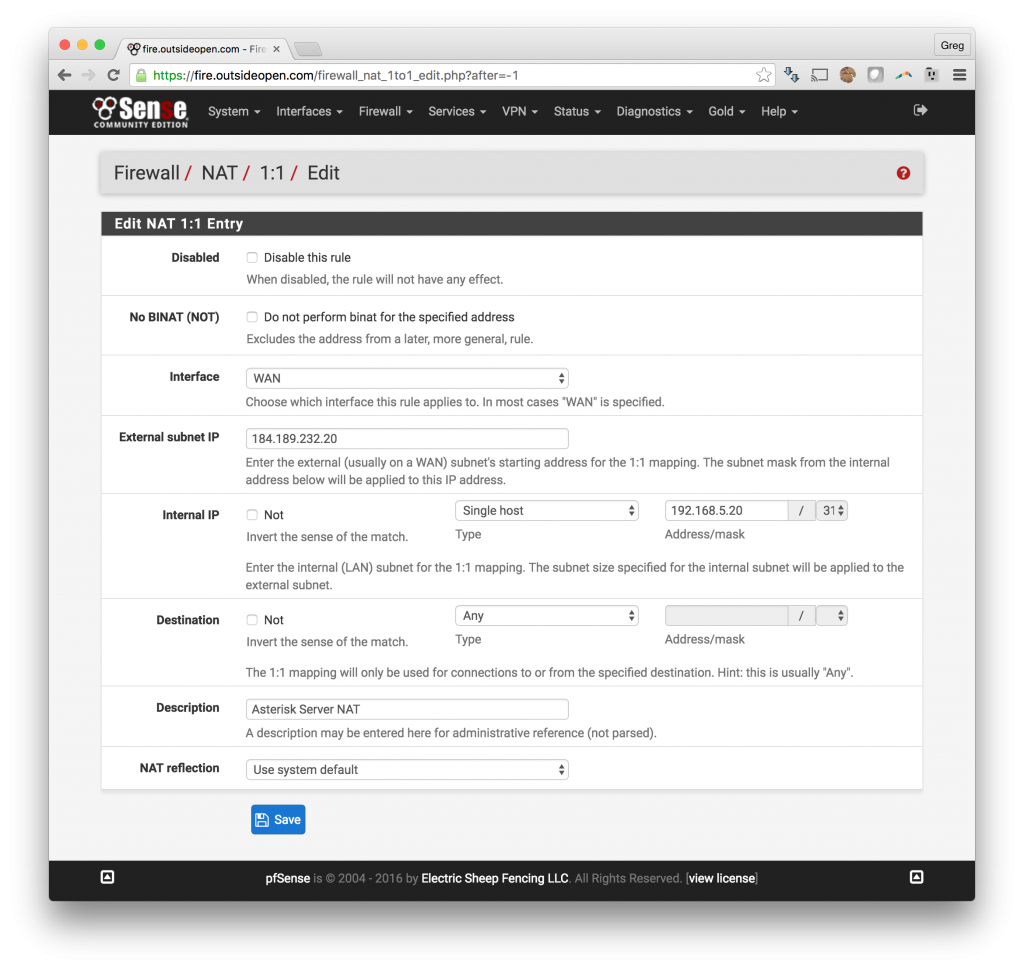
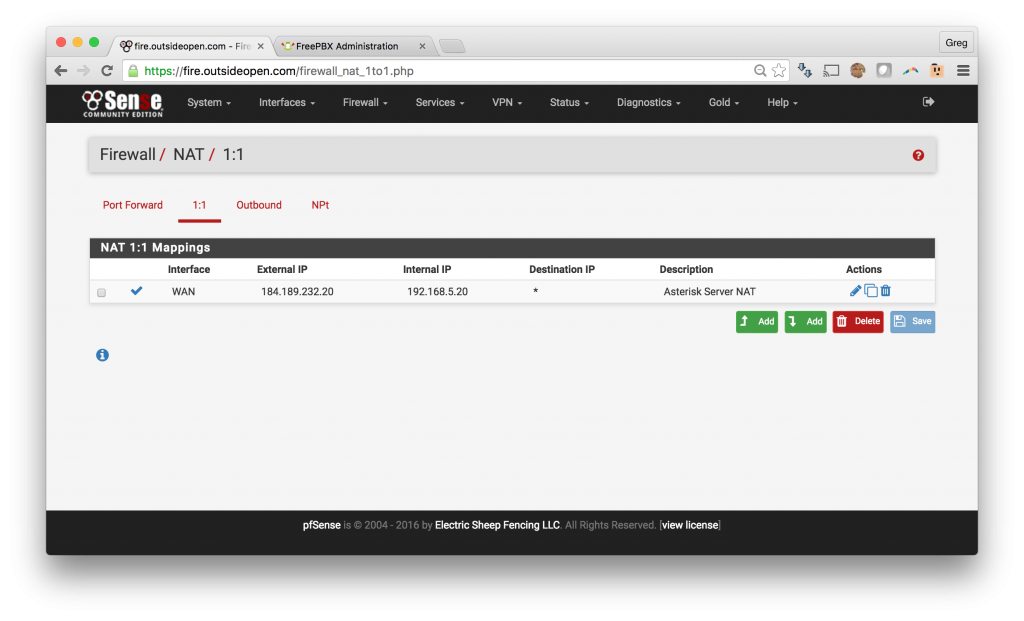
Option A: pfSense in an environment where you have multiple public IPs and with one IP assigned to your Asterisk / FreePBX or Avaya system.
Option B: Port forwarding on pfSense for single IP system like you would have on a home Internet connection.
Option A – using a dedicated static IP:
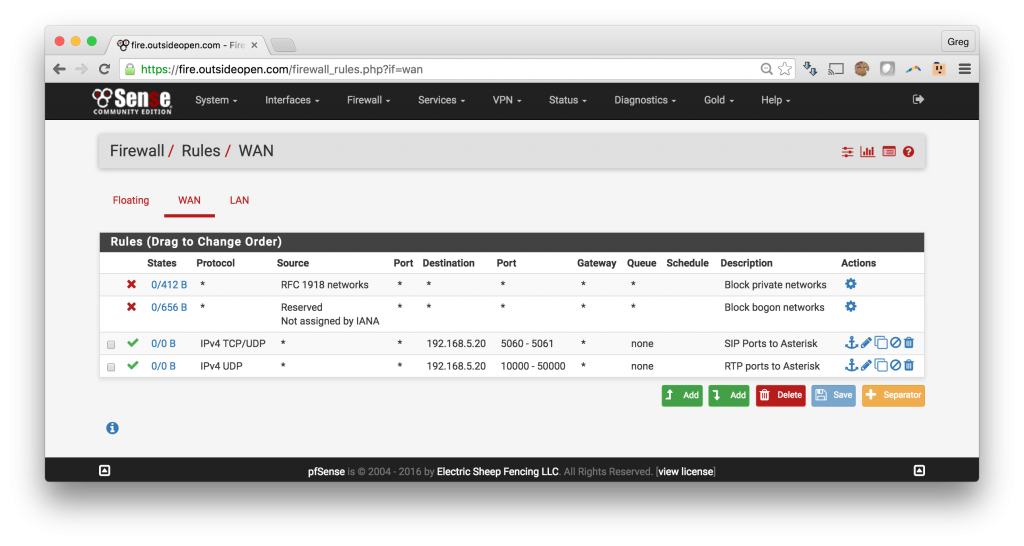
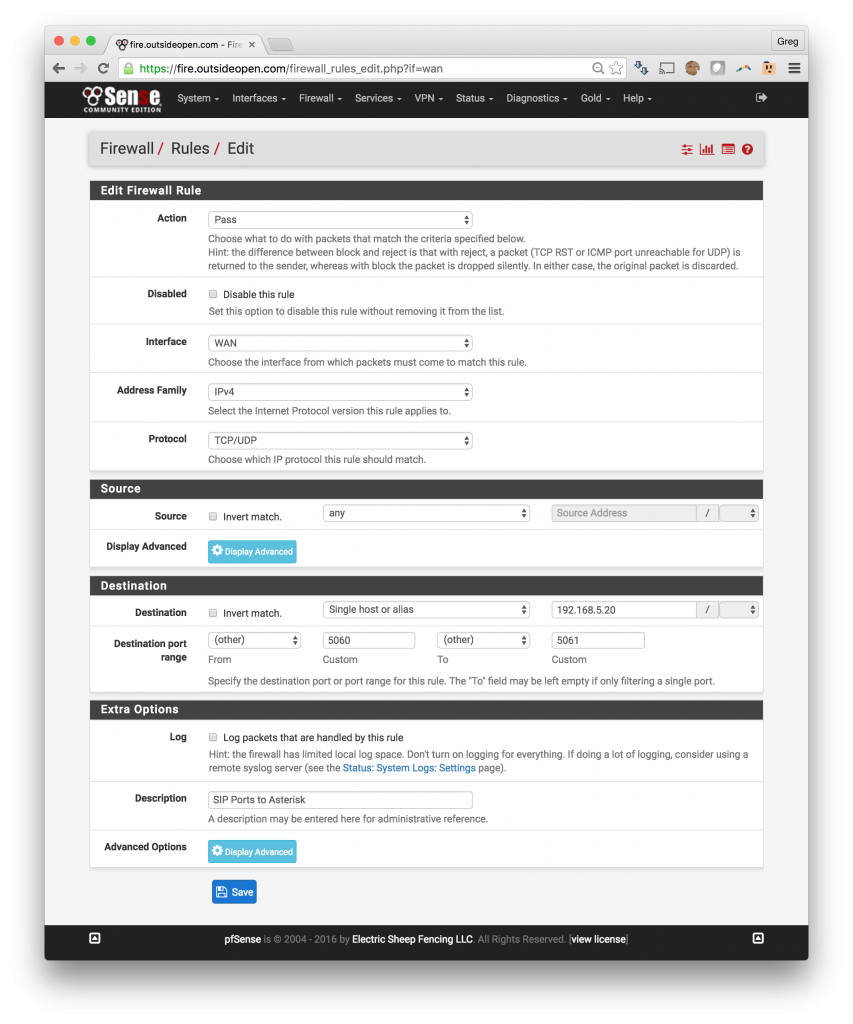
3. Firewall rules to open SIP ports through the pfSense
- Open SIP ports thru pfSense to the Asterisk server
- Click Firewall -> Rules
- Click on the Add button which has an arrow pointed down
- Change Protocol to TCP/UDP
- Under Destination add a Single Host or Alias and input the internal IP for your Asterisk server
- Destination Port Range -> Choose (other) and enter 5060 and 5061
- This will open SIP ports 5060 and 5061 to the VOIP server
- Add a description and save
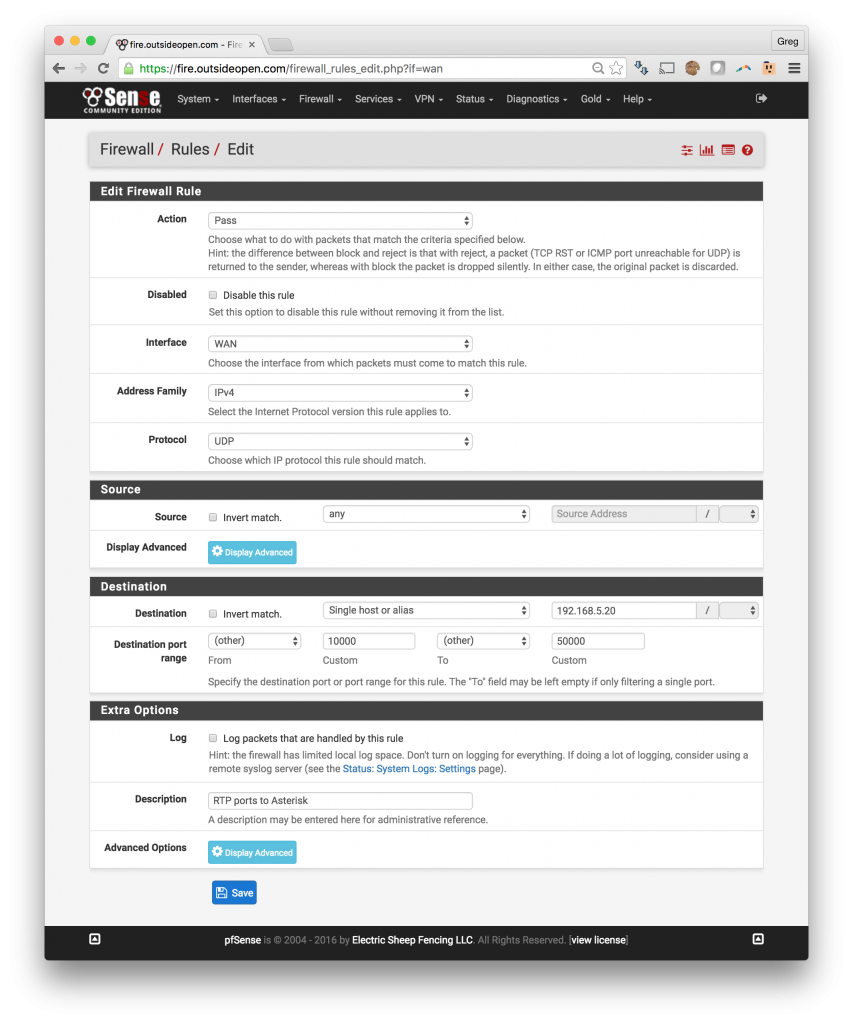
4. Firewall rules to open RTP port range through the pfSense
- Allow RTP ports thru the pfSense
- Click Firewall -> Rules
- Click on the Add button which has an arrow pointed down
- Change Protocol to UDP
- Under Destination add a Single Host or Alias and input the internal IP for your Asterisk server
- Destination Port Range -> Choose (other) and enter 10000 and 50000
- This will open RTP ports 10,000 – 50,000 to the VOIP server
- If you know the range that your VOIP server is using the you can fine tune this range
- Add a description and save
Option B – port forwarding:
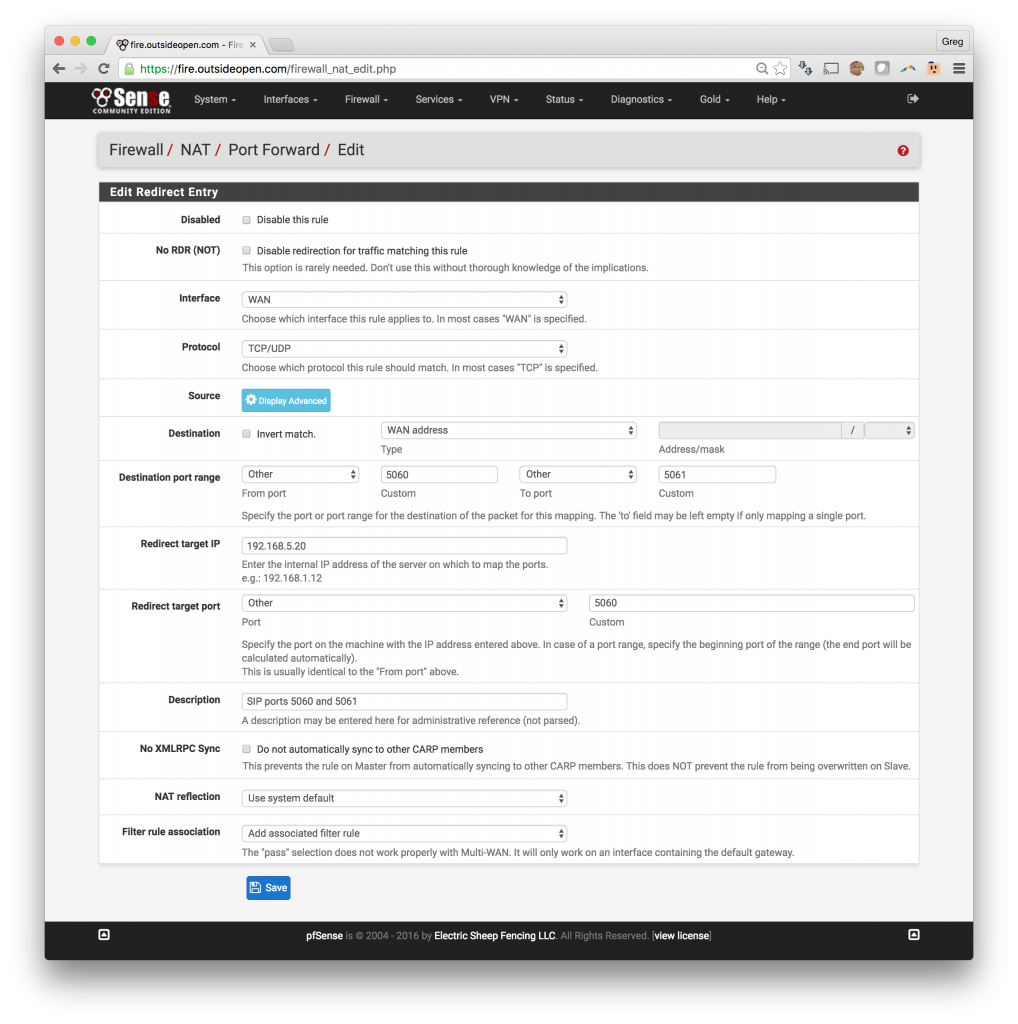
1. Forward SIP ports thru pfSense to the Asterisk VOIP server
- Click Firewall -> NAT
- Under the Port Forward tab, click on the Add button which has an arrow pointed down
- Change Protocol to TCP/UDP
- Destination Port Range -> Choose (other) and enter 5060 and 5061
-
- This will open SIP ports 5060 and 5061 to the VOIP server
- Enter your VIOP server internal IP in the Redirect target IP field
- Change Redirect target port to Other and enter 5060
- The pfSense will calculate the range based upon what you entered above
- Add a description and save
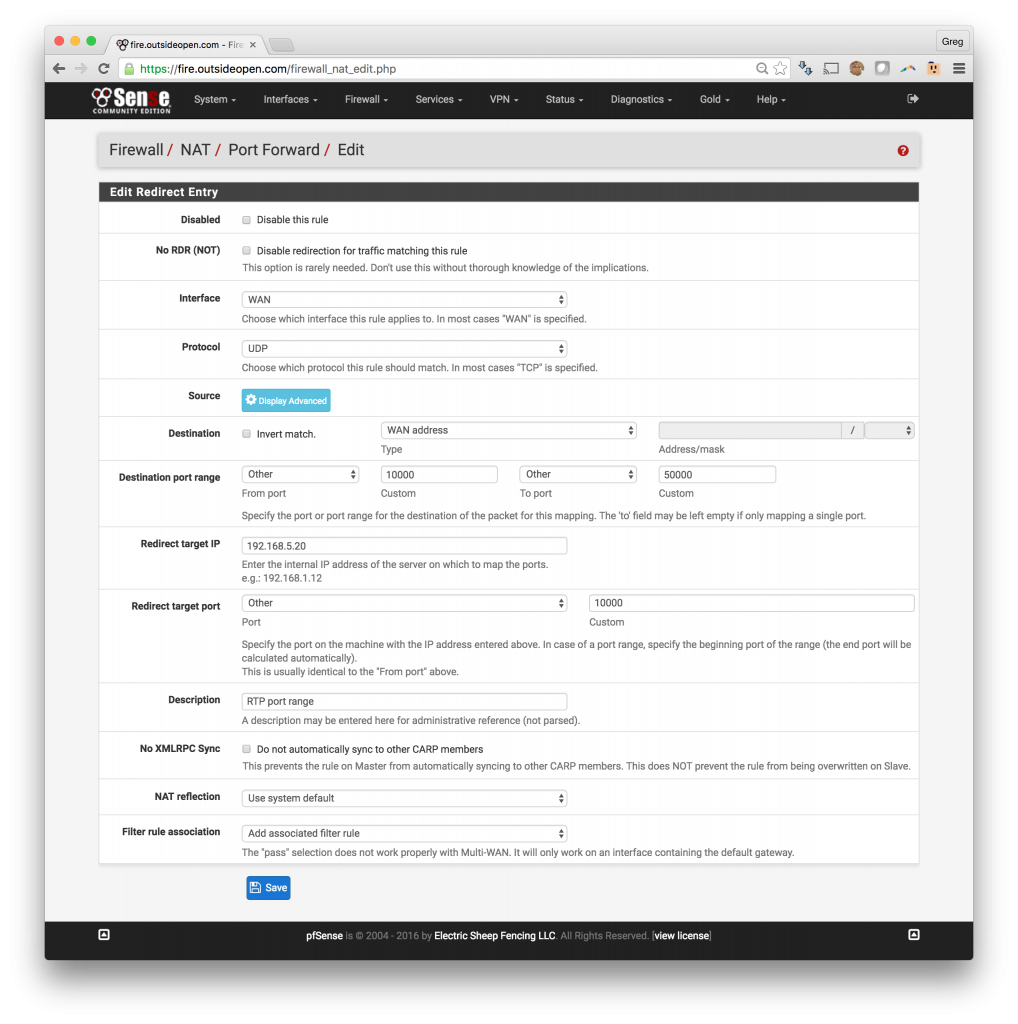
2. Forward RTP ports thru pfSense to the Asterisk VOIP server
- Click Firewall -> NAT
- Under the Port Forward tab, click on the Add button which has an arrow pointed down
- Change Protocol to UDP
- Destination Port Range -> Choose (other) and enter 10000 and 50000
- This will open RTP ports 10,000 – 50,000 to the VOIP server
- If you know the range that your VOIP server is using the you can fine tune this range
- Enter your VIOP server internal IP in the Redirect target IP field
- Change Redirect target port to Other and enter 10000
- The pfSense will calculate the range based upon what you entered above
- Add a description and save
When you have completed these steps, your Port Forward tab will contain the following port forwards.
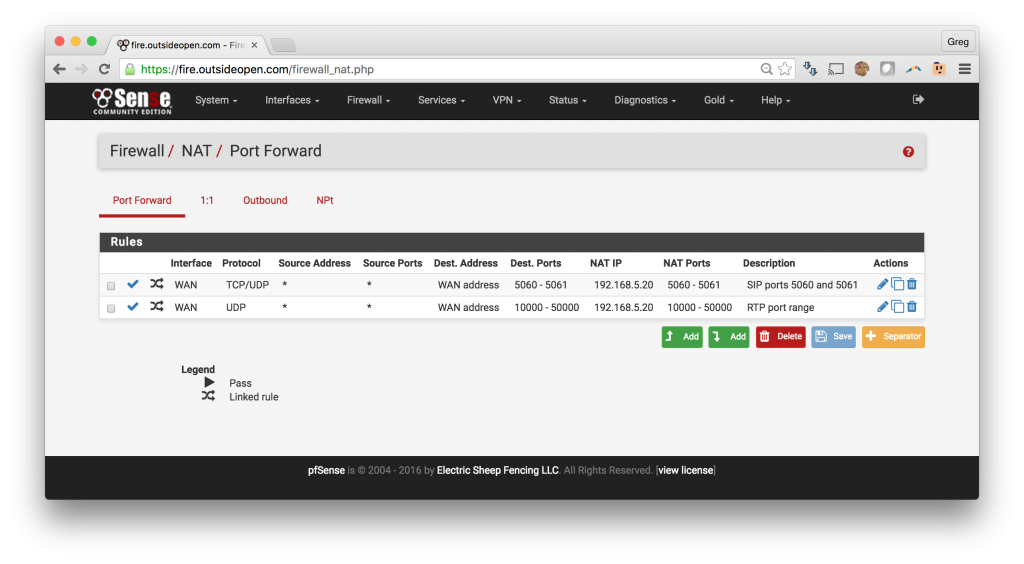
The pfSense will automatically add the associated filter rules with the following results:
